Prospecting Roblox Ores & Museum Boosts Guide (2026)
I’ve been completely obsessed with Prospecting lately, and let me tell you – there’s so much more to this game than just digging around in the dirt. After spending countless hours exploring every location and testing different museum setups, I’m excited to share everything I’ve learned about ores, locations, and those game-changing museum boosts.
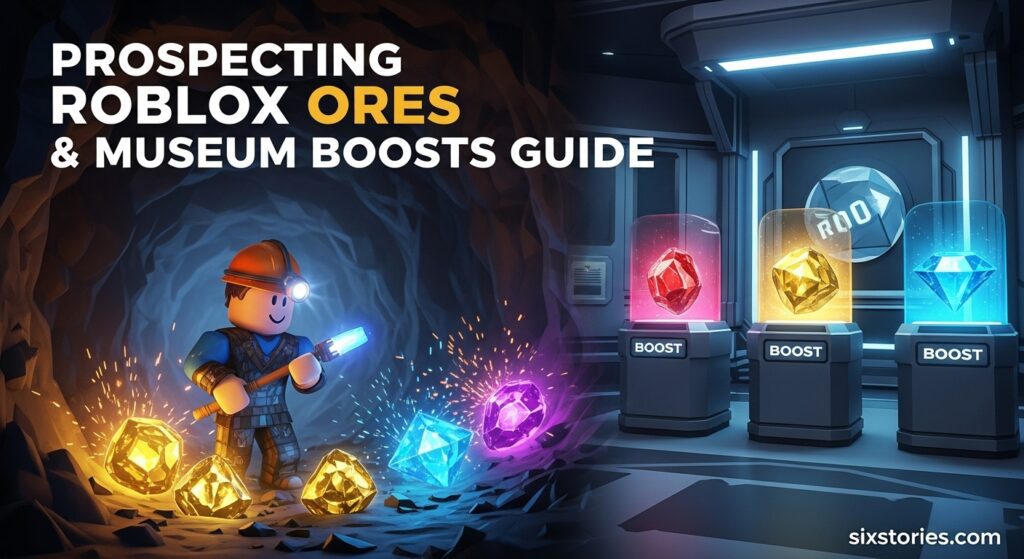
Whether you’re just starting out or you’re already deep into the endgame, this guide will help you understand exactly which ores to hunt for, where to find them, and how to maximize your museum benefits. Trust me, once you understand how the museum system works, your entire approach to the game will change.
Article Includes
What Makes Prospecting’s Ore System So Addictive?
When I first started playing Prospecting, I thought it was just another simple mining game. Boy, was I wrong! The ore system is incredibly deep, with over 50 different minerals spread across multiple rarities, each with their own spawn locations and unique properties.
What really hooked me was discovering that some ores are worth millions of dollars per kilogram, while others serve specific purposes in crafting and enchanting. The game does an amazing job of making every find feel potentially valuable, especially when you’re hunting for those elusive Mythic and Exotic rarities.
Understanding the Rarity System
The ore rarity system in Prospecting follows this hierarchy:
- Common (Gray): Your bread and butter ores
- Uncommon (Green): Decent value and fairly common
- Rare (Blue): Good money makers, especially early game
- Epic (Purple): Essential for mid-game progression
- Legendary (Yellow): High-value ores perfect for crafting
- Mythic (Red): Extremely rare and valuable
- Exotic (Rainbow): The holy grail of ores
I learned early on that your Luck stat determines how many times the game rolls for rarity. So if you have 50 Luck, you’re about 50x more likely to find higher-rarity items compared to someone with just 1 Luck. This completely changed how I approached the game!
Complete Ore List by Rarity
Common Ores (Gray Rarity)
Let me start with the basics. These common ores might not seem exciting, but they’re your foundation for earning those first crucial dollars:
| Ore | Value ($/kg) | Best Locations | Museum Effect |
|---|---|---|---|
| Pyrite | $500 | Rubble Creek Sands | Capacity |
| Silver | $700 | Sunset Beach, Fortune River Delta | Shake Speed |
| Copper | $800 | Crystal Cavern River, Azuralite Oasis | Size Boost |
| Gold | $1,000 | Fortune River, Crystal Cavern River | Sell Boost |
| Platinum | $2,000 | Rubble Creek Sands, Fortune River | Dig Speed |
| Seashell | $2,200 | Sunset Beach | Capacity |
| Amethyst | $3,500 | Rubble Creek Sands, Azuralite Oasis | Dig Speed |
| Pearl | $5,000 | Sunset Beach, Fortune River Delta | Shake Speed |
Pro Tip: I always recommend new players focus on Fortune River for their early grinding. It’s got a great mix of common and rare ores that’ll give you steady income while you build up your equipment.
Uncommon Ores (Green Rarity)
These green-rarity ores start getting more interesting, both in value and museum effects:
| Ore | Value ($/kg) | Best Locations | Museum Effect |
|---|---|---|---|
| Titanium | $7,500 | Rubble Creek Deposits, Fortune River | Dig Speed |
| Neodymium | $10,000 | Sunset Beach, Crystal Cavern River | Shake Strength |
| Topaz | $14,000 | Rubble Creek Sands, Fortune River Delta | Capacity |
| Smoky Quartz | $16,000 | Sunset Beach, Azuralite Oasis | Shake Strength |
| Malachite | $18,000 | Crystal Cavern River, Azuralite Oasis | Modifier Boost |
| Coral | $23,000 | Sunset Beach, Fortune River Delta | Capacity |
| Sapphire | $25,000 | Rubble Creek Deposits, Fortune River | Dig Speed |
Rare Ores (Blue Rarity)
Here’s where things get exciting! Rare ores are perfect for mid-game progression:
| Ore | Value ($/kg) | Best Locations | Museum Effect |
|---|---|---|---|
| Ruby | $30,000 | Rubble Creek Sands, Fortune River | Shake Strength |
| Lapis Lazuli | $40,000 | Rubble Creek Deposits, Fortune River | Dig Speed |
| Jade | $40,000 | Fortune River, Fortune River Delta | Modifier Boost |
| Silver Clamshell | $50,000 | Sunset Beach, Fortune River Delta | Shake Speed |
| Onyx | $75,000 | Sunset Beach, Crystal Cavern River | Size Boost |
| Meteoric Iron | $80,000 | Rubble Creek Sands, Fortune River | Shake Strength |
| Azuralite | $120,000 | Crystal Cavern River, Azuralite Oasis | Dig Speed |
Important Note: I realized that Azuralite is one of the most valuable rare ores, and it’s perfect for farming at Crystal Cavern River. The location is easily accessible and has great spawn rates.
Epic Ores (Purple Rarity)
Epic ores are where I started taking the game seriously. These are essential for crafting and provide excellent museum benefits:
| Ore | Value ($/kg) | Best Locations | Museum Effect |
|---|---|---|---|
| Iridium | $150,000 | Rubble Creek Sands, Fortune River Delta | Dig Speed |
| Moonstone | $200,000 | Sunset Beach, Fortune River Delta | Shake Speed |
| Ashvein | $222,000 | Sunset Beach, Crystal Cavern River | Size Boost |
| Emerald | $250,000 | Rubble Creek Sands, Azuralite Oasis | Luck |
| Golden Pearl | $250,000 | Sunset Beach, Fortune River Delta | Capacity |
| Borealite | $280,000 | Crystal Cavern River, Azuralite Oasis | Dig Speed |
| Osmium | $300,000 | Rubble Creek Deposits, Crystal Cavern River | Size Boost |
| Opal | $325,000 | Rubble Creek Sands, Sunset Beach | Shake Speed |
| Aurorite | $350,000 | Rubble Creek Deposits, Fortune River | Dig Speed |
Crafting Alert: Don’t sell your Aurorite! I learned this the hard way – it’s essential for enchanting, and you’ll kick yourself later if you sell it for quick cash.
Legendary Ores (Yellow Rarity)
These golden beauties are where the real money starts:
| Ore | Value ($/kg) | Best Locations | Museum Effect |
|---|---|---|---|
| Rose Gold | $500,000 | Rubble Creek Sands, Fortune River | Shake Strength |
| Palladium | $500,000 | Fortune River, Crystal Cavern River | Sell Boost |
| Diamond | $1,000,000 | Fortune River, Sunset Beach | Luck |
| Uranium | $1,500,000 | Fortune River Delta, Azuralite Oasis | Modifier Boost |
| Luminum | $2,000,000 | Sunset Beach, Crystal Cavern River | Capacity |
| Catseye | $2,222,222 | Rubble Creek Deposits, Fortune River | Capacity |
| Starshine | $2,500,000 | Crystal Cavern River, Azuralite Oasis | Size Boost |
| Aetherite | $3,000,000 | Multiple locations | Dig Speed |
Strategic Tip: I always save my Legendary ores for crafting unless I’m desperate for cash. The crafting recipes require specific Legendary materials, and they’re much harder to find than you’d think.
Mythic Ores (Red Rarity)
Now we’re talking about the really special stuff. Mythic ores are incredibly rare and valuable:
| Ore | Value ($/kg) | Best Locations | Museum Effect |
|---|---|---|---|
| Pink Diamond | $6,000,000 | Rubble Creek Sands, Fortune River Delta | Luck (0.5x) |
| Painite | $10,000,000 | Fortune River, Sunset Beach | Size Boost (0.5x) |
| Inferlume | $14,000,000 | Sunset Beach, Crystal Cavern River | Luck (0.5x) |
| Vortessence | $20,000,000 | Fortune River Delta, Azuralite Oasis | Capacity (0.5x) |
| Prismara | $25,000,000 | Azuralite Oasis only | Multiple boosts (0.25x each) |
Mythic Museum Tip: Some Mythic ores like Prismara give multiple museum effects simultaneously! This makes them incredibly valuable for museum displays, even if the individual boosts are smaller.
Exotic Ores (Rainbow Rarity)
These are the ultimate prizes – the ores that make every prospector’s heart skip a beat:
| Ore | Value ($/kg) | Location | Museum Effect |
|---|---|---|---|
| Dinosaur Skull | $50,000,000 | Infernal Heart only | Size Boost + Sell Boost (0.5x each) |
| Cryogenic Artifact | $100,000,000 | Frozen Peak only | Dig Amount + Shake Strength (+1.5x), Dig Speed + Shake Speed (-1x) |
| Voidstone | $111,111,111 | The Void only | Luck + Capacity (0.5x each) |
Exotic Hunt Strategy: These locations are time-limited and extremely challenging to access. I spent weeks preparing before attempting to reach the Infernal Heart, and it was totally worth it!
Understanding Museum Boosts
The Museum system is honestly one of my favorite features in Prospecting. It’s not just about displaying pretty rocks – these boosts can completely transform your gameplay experience.
How Museum Boosts Work
When you place an ore in the museum, you get permanent stat boosts based on:
- Ore Rarity: Higher rarities provide stronger base effects
- Ore Weight: Heavier specimens amplify the boost
- Ore Modifiers: Additional bonus effects on top of the base
Museum Modifier Effects
I discovered that certain ore modifiers provide extra museum benefits:
- Pure: Dig Speed boost
- Shiny: Shake Strength boost
- Glowing: Shake Speed boost
- Scorching: Dig Strength boost
- Iridescent: Luck boost
- Irradiated: Modifier Boost
- Electrified: Dig and Shake Speed
- Voidtorn: Luck and Capacity
The modifier boost values scale with rarity:
- Common/Uncommon/Rare: +0.01x
- Epic: +0.02x
- Legendary: +0.03x
- Mythic: +0.05x
- Exotic: +0.1x
Best Museum Setup Strategy
After experimenting with different combinations, here’s my recommended approach:
- Prioritize Dig Speed and Shake Strength for faster farming
- Boost Luck to find rarer ores more consistently
- Increase Capacity for longer mining sessions
- Focus on Size Boost for bigger finds
The key is finding the heaviest specimens of each rarity with the best modifiers. I always keep my eyes peeled for heavy Mythics and Exotics with beneficial modifiers!
Location-Specific Mining Guide
Fortune River – Best for Beginners
I always recommend Fortune River for new players because:
- Great variety of Common to Rare ores
- Consistent spawn rates
- Easy accessibility
- Perfect for learning the game mechanics
Best Ores Here: Gold, Ruby, Lapis Lazuli, Diamond
Azuralite Oasis – Mid-Game Powerhouse
This location became my go-to spot once I had better equipment:
- Excellent for Azuralite farming
- Good Epic ore spawns
- Higher-end Legendary possibilities
- Requires some investment in gear
Best Ores Here: Azuralite, Emerald, Vortessence, Prismara
Sunset Beach – Diverse Options
Sunset Beach offers incredible variety:
- Unique water-based ores like pearls and coral
- Good spread across all rarities
- Excellent for completing collections
- Great for museum specimen hunting
Best Ores Here: Golden Pearl, Moonstone, Diamond, Painite
Special Event Locations
The Void
The Void is a rotating event that opens periodically and offers:
- Access to all non-Exotic ores
- Random pool based on 3 selected areas
- Limited-time Voidstone access
- Enhanced modifier chances
Infernal Heart
Opens for 30 minutes every hour at XX:15:
- Exclusive Dinosaur Skull location
- High concentration of Mythic ores
- Requires Fire Priest quest completion
- Extremely competitive farming
Frozen Peak
- Cryogenic Artifact exclusive location
- Challenging environmental conditions
- Worth the preparation required
Advanced Mining Strategies
Luck Optimization
I can’t stress enough how important Luck is in Prospecting. Here’s how I maximize mine:
- Equipment Upgrades: Invest in Luck-boosting tools
- Museum Displays: Prioritize Luck-giving ores in museum
- Friend Bonuses: Play with friends for small Luck boosts
- Code Redemption: Always claim active codes for temporary boosts
- Enchantments: Focus on Luck-enhancing enchants
Target Farming Technique
For specific ores, I use this strategy:
- Identify the location where your target ore has the least competition in its rarity tier
- Focus exclusively on that location during prime times
- Use area-specific Luck boosts when available
- Time your farming during low-server population periods
Crafting vs Selling Decisions
Here’s my rule of thumb:
- Always Save: Legendary and Mythic ores (especially Aurorite and Aetherite)
- Usually Save: High-value Epic ores needed for recipes
- Safe to Sell: Most Common through Rare ores (unless needed for quests)
- Context Dependent: Epic ores – check current crafting needs first
Museum Display Optimization
Rarity-Based Strategy
Each museum display accepts specific rarities, and some require Meteor Shards to unlock:
- Common: 3 displays total (1 free, 2 unlockable)
- Uncommon: 3 displays total (1 free, 2 unlockable)
- Rare: 3 displays total (1 free, 2 unlockable)
- Epic: 3 displays total (1 free, 2 unlockable)
- Legendary: 3 displays total (1 free, 2 unlockable)
- Mythic: 2 displays total (both require payment)
- Exotic: 1 display total (requires Meteor Shards)
Weight Prioritization
I always prioritize heavier specimens because:
- Weight directly multiplies the base museum effect
- A heavy Common can outperform a light Uncommon
- Weight scales exponentially with the benefits
- Perfect specimens become incredibly valuable
Modifier Stacking
The most powerful museum setups combine:
- High-rarity base ore
- Maximum possible weight
- Beneficial modifier
- Strategic placement for stat synergy
Pro Tips from My Experience
Early Game Focus
- Start at Fortune River and stay there until you can afford better equipment
- Don’t sell your first Legendary – save it for museum display
- Prioritize Dig Speed and Shake Strength upgrades first
- Join servers with active players for friend bonuses
Mid Game Strategy
- Begin targeting specific Epic ores for crafting recipes
- Unlock additional museum displays systematically
- Focus on Luck optimization through all available methods
- Start preparing for special location access
Late Game Mastery
- Time your special location visits strategically
- Maintain multiple museum setups for different goals
- Focus on perfect modifier combinations
- Help newer players – the community bonuses benefit everyone
Common Mistakes to Avoid
- Selling Crafting Materials: I sold my first Aurorite and regretted it immediately
- Ignoring Museum Weight: A heavy Common often beats a light Rare for museum purposes
- Location Tunnel Vision: Don’t get stuck farming one spot – variety is key
- Modifier Dismissal: Those modifier boosts add up significantly over time
- Impatient Special Location Rushing: Prepare properly before attempting Infernal Heart or Frozen Peak
The Future of Prospecting
Based on the update patterns I’ve observed, the developers consistently add:
- New ore types with unique properties
- Additional special locations with exclusive ores
- Enhanced museum features and display options
- Expanded crafting recipes requiring rare materials
- Quality of life improvements based on community feedback
I expect we’ll see more Exotic-tier ores, possibly new rarity tiers, and additional ways to utilize our collections beyond just museum displays and crafting.
Conclusion
Prospecting has evolved into one of the most sophisticated mining games on Roblox, and mastering its ore system is incredibly rewarding. The combination of location strategy, museum optimization, and crafting preparation creates a gameplay loop that keeps me coming back every day.
Whether you’re hunting for that first Mythic ore or trying to complete your Exotic collection, remember that patience and strategy will get you much further than mindless grinding. The museum system adds incredible depth to the experience, turning every find into a potential game-changer.
I hope this guide helps you on your prospecting journey! The thrill of finding that perfect heavy Mythic with an ideal modifier never gets old, and I’m sure you’ll experience that same excitement as you dive deeper into this amazing game.
Remember to bookmark this guide – I’ll be updating it as new content releases and I discover new strategies. Happy prospecting, and may your pans always find gold!
FAQ
What’s the best location for new players?
Fortune River is perfect for beginners. It offers a great variety of ores from Common to Legendary rarity, has consistent spawn rates, and provides steady income while you learn the game mechanics.
Should I sell high-rarity ores or save them for crafting?
Generally, save all Legendary and Mythic ores for crafting, especially Aurorite and Aetherite which are essential for enchanting. Most Common through Rare ores are safe to sell unless needed for specific quests.
How does the Luck stat work exactly?
Your Luck stat determines how many times the game rolls for rarity when you find an ore. Higher Luck means more chances at getting rare finds – someone with 50 Luck has roughly 50x better odds than someone with 1 Luck.
What determines museum boost values?
Museum boost effectiveness depends on three factors: ore rarity (higher = better base boost), ore weight (heavier = stronger multiplier), and ore modifiers (additional bonus effects on top of the base).
When do special locations like Infernal Heart open?
The Infernal Heart opens for 30 minutes every hour at the XX:15 mark (like 1:15, 2:15, 3:15, etc.). The Void operates on different schedules, and you should check in-game announcements for current timing.
Can I change museum displays after placing ores?
Yes! You can replace any ore in your museum displays at any time without restrictions. This lets you experiment with different combinations and upgrade to better specimens as you find them.