Brainrot Evolution Beginner’s Guide (August 2026)
I’ll be completely honest with you – when I first heard about Brainrot Evolution, I thought my friends were pulling my leg. A Roblox game where you start as a weird meme creature and evolve into even weirder forms by eating stuff? It sounded absolutely ridiculous. But after spending countless hours (way more than I’d like to admit) in this game, I’m completely hooked, and I totally get why it’s blown up to over 65 million visits.
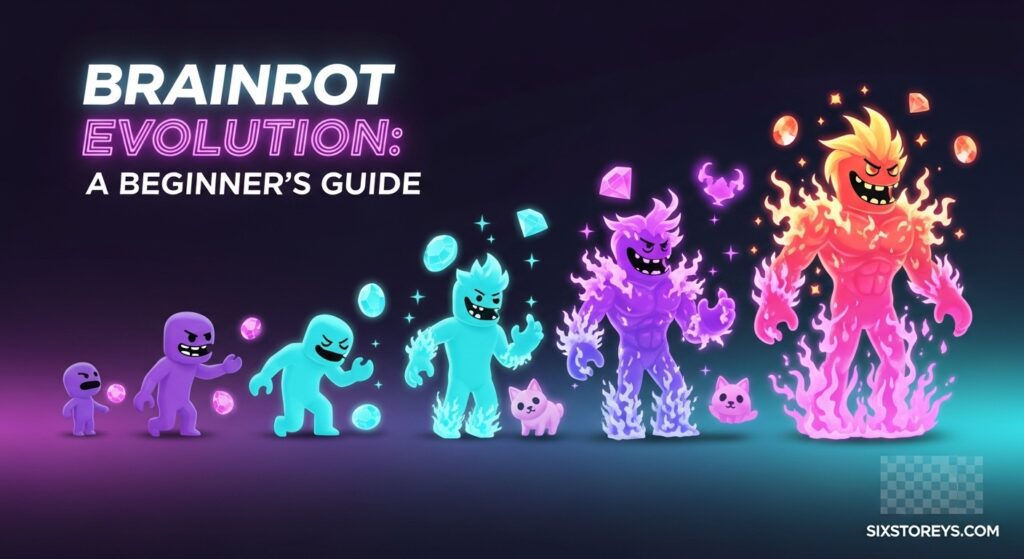
Look, I know the name sounds kind of crazy, but trust me when I say this game is one of the most addictive simulators I’ve played on Roblox. Whether you’re into grinding, collecting pets, or just want to see how bizarre your character can get, there’s something here for everyone. I’ve learned a ton through trial and error, and I’m pumped to share everything I’ve discovered with you.
Article Includes
What Exactly Is Brainrot Evolution?
Alright, so here’s the deal. Brainrot Evolution is this wild incremental simulator on Roblox where you start as a goofy meme-inspired character and basically eat your way to greatness. I’m talking about smashing objects, consuming creatures, and leveling up to unlock progressively more powerful (and hilarious) forms.
The game launched earlier this 2026, and it absolutely exploded in popularity. I remember seeing it climb the Roblox charts and thinking it’d be another flash-in-the-pan game, but nope – it actually reached 700,000 concurrent players at its peak! That’s insane for a relatively new game.
What really got me hooked is the simplicity mixed with surprising depth. On the surface, you’re just clicking and eating things. But underneath, there’s this whole ecosystem of pets, relics, rebirths, dungeons, and secret evolutions that kept me coming back for “just one more session” (which somehow always turned into three hours).
Getting Started: My First Steps in Brainrot Evolution
When I first spawned into the game, I was immediately thrown into Tung Tung Park as this character called Tung Tung Sahur. No tutorial holding my hand, no safe zone – just me and a map full of objects to smash and creatures to fight. It was actually kind of refreshing after playing so many over-tutorialized games.
Here’s what I learned pretty quickly: the goal is simple – gain experience by consuming everything in sight. Every object you smash, every creature you eat, it all contributes to your XP bar at the bottom of the screen. Once that bar fills up, boom – you level up and evolve into a more powerful form.
The evolution system is what makes this game so addictive, at least for me. Each time you level up, your character transforms into something completely different. I went from Tung Tung Sahur to Tralalero Tralala (which looks like some kind of shark-hybrid thing), then to Gorillo Watermellondrillo, and the forms just kept getting weirder and more powerful.
Understanding the Three Main Resources
I was pretty confused at first about all the different currencies flying around, so let me break it down for you:
Experience Points (XP): This is your bread and butter for leveling up and evolving. Every enemy you defeat, every object you smash – it all gives you XP. I realized pretty quickly that passive enemies (the ones that don’t fight back) are actually better for farming XP when you’re just starting out because you won’t die and lose time respawning.
Gems: These green glowing beauties are what you’ll use for permanent damage boosts. I can’t stress enough how important these are. Early on, I ignored them completely and struggled way more than I should have. Now, I spend my gems immediately on damage upgrades whenever I get them. You’ll find gems from defeating enemies, with meme-inspired enemies having a higher drop rate.
Wins (Trophies): This is the currency you’ll use for hatching pet eggs. I learned not to go crazy opening eggs in the early maps because you’ll want to save your Wins for the later, more expensive eggs that have better pets. It’s tempting to open every egg you see, but trust me – patience pays off here.
The Evolution System: From Weak to Absolutely Broken
Let me tell you about my favorite part of this game – the evolution progression. I’ve unlocked over 30 different evolutions so far, and each one feels like a genuine power spike.
The way it works is pretty straightforward. As you level up, you automatically evolve into preset forms. The game has a Wikipedia feature (accessible from your inventory) where you can see all the evolutions you’ve unlocked. Here’s what I love about it – once you’ve unlocked an evolution, you can switch back to it anytime if you want to mix things up.
But here’s my pro tip: always use your latest evolution. I see so many new players switching back to earlier forms because they look cooler, but you’re literally handicapping yourself. The newer evolutions have significantly better stats, meaning more damage output and health.
Some of the evolutions I’ve unlocked include:
- Tung Tung Sahur (starting form)
- Tralalero Tralala
- Gorillo Watermellondrillo
- Cocofanto Elefanto
- Ballerina Cappuccina
- Trulimero Trulicina
And dozens more! The variety keeps things fresh, and I genuinely get excited every time I’m about to hit a new evolution level.
Pets: Your Damage-Boosting Companions
Okay, so pets in Brainrot Evolution aren’t just cute collectibles – they’re essential for your damage output. When I first started, I thought pets were optional. Big mistake. Huge. They provide multiplicative damage bonuses that stack with your other upgrades, and the difference between playing with pets versus without is night and day.
How to Get Pets
You’ll hatch pets from eggs using your Wins. Each map has its own egg selection, and generally, the later maps have eggs with better pets. Here’s my egg-opening strategy that’s worked really well:
Early Maps (Tung Tung Park, Larila Desert): Open 2-3 eggs maximum. You just want some basic pets equipped so you’re not running around naked. Don’t blow all your Wins here.
Mid-Game Maps: Start being more selective. Open eggs until you get at least one Rare or Epic pet, then move on.
Late-Game Maps: This is where I go ham with my Wins. The legendary pets from late-game eggs provide insane damage multipliers that make earlier pets look like jokes.
Pet Rarity System
Pets come in different rarities, and the higher the rarity, the better the damage boost:
- Common: Basic damage boost (like 1.5x)
- Uncommon: Decent boost (around 2x)
- Rare: Good boost (3-4x)
- Epic: Great boost (5-8x)
- Legendary: Incredible boost (10x+)
- Secret: Ultra-rare with special percentages
I can only equip three pets at a time by default (you can buy more slots with Robux, but I haven’t done that). My strategy is to always keep my three best pets equipped. Check your pets regularly because you’ll constantly be hatching better ones as you progress.
Relics: The Secret Sauce
I’m not gonna lie – I completely ignored relics for my first few days playing, and I was kicking myself once I figured out how powerful they are. Relics are special items that provide passive bonuses, kind of like pets but different. They focus more on utility and special effects rather than just straight damage.
You get relics primarily from:
- Chests from the Season Pass: If you’re playing during an active season, completing pass missions will give you chests
- In-Game Events: Special limited-time events drop exclusive relics
- Dungeons: This is the main source I use (more on dungeons in a bit)
Just like pets, you can equip multiple relics from your inventory, and their effects stack. Some relics give XP boosts, others might increase your movement speed, and some provide damage bonuses against specific enemy types. The variety means you can customize your build to match your playstyle.
The Rebirth System: Starting Over to Get Even Stronger
Okay, this is where things get really interesting. The Rebirth system had me confused at first because it seemed counterintuitive. Why would I want to reset all my progress?
But here’s the thing – rebirthing is actually the key to becoming truly powerful in Brainrot Evolution. When you perform a Rebirth, you reset your level and lose all your unlocked evolutions. Sounds terrible, right? But in exchange, you get permanent stat boosts that make your next playthrough exponentially faster and stronger.
When to Rebirth?
You can perform your first Rebirth once you hit Level 11 and escape Tung Tung Park. I remember being so nervous about clicking that Rebirth button because I’d worked hard to unlock all those evolutions. But trust me, it’s worth it.
Here’s what you keep when you Rebirth:
- All your Gems
- All your Wins
- All your Pets
- All your Relics
Here’s what you lose:
- Your current level (reset to 1)
- Your unlocked evolutions (you’ll re-unlock them much faster though)
- Access to late-game areas (until you level back up)
My advice? Rebirth as soon as you can. Don’t wait around trying to explore every corner of the late game. The stat multipliers you get from Rebirth make your second, third, and fourth runs so much faster. I can now reach areas in 30 minutes that took me hours on my first playthrough.
Combat & Enemy Types: Fight Smart, Not Hard
The combat in Brainrot Evolution is pretty straightforward – you just click on enemies (or use Auto Attack, which I’ll talk about later). But not all enemies are created equal, and understanding the different types has made me way more efficient.
Passive Enemies
These are my favorite targets, especially when I’m grinding for levels. Passive enemies don’t fight back – they just sit there while you wail on them. They typically have higher HP than aggressive enemies, but since there’s zero risk of dying, I can just farm them endlessly.
When I’m trying to level quickly, I’ll find a good cluster of passive enemies and just go to town. Pop an XP potion if you have one, equip your best pets, and watch that level bar climb.
Aggressive Enemies
These guys will fight back, obviously. They have lower HP than passives but deal damage, which means you’ll need to actually pay attention. Early on, I died a lot to aggressive enemies because I was too cocky. The good news? Dying has no penalty – you just respawn at the spawn point and can try again.
Aggressive enemies typically drop more Gems than passives, so once you’re strong enough, they’re worth targeting for gem farming.
Boss Enemies
Each map has a boss, and these are the big boys. Bosses give massive XP and rewards, but they’re also significantly stronger than regular enemies. I’ve found that if I can comfortably defeat a boss without dying, it’s time to move to the next map because the boss is typically worth more XP than farming regular enemies.
Some bosses are also required for events, so you’ll want to be able to beat them to access exclusive rewards and pets.
Dungeons: High Risk, High Reward
Dungeons were a game-changer for me when I finally understood them. They’re special challenge areas that you can access from certain maps, and they offer way better rewards than normal farming.
Larila Desert Dungeon (Vault of Jupiter)
This is the first dungeon I accessed, and you can try it once you unlock Gorillo Watermellondrillo evolution. The rewards include:
- Tons of XP (way more than regular farming)
- Exclusive relics
- Vault Crates (these can contain powerful brainrots like Bisonte Giuppiture Giuppitercito)
I make it a point to run dungeons at least once per play session because the relic drops are crucial for late-game progression. Even if you’re underleveled, it’s worth attempting because the XP gain is so significant.
Secret Brainrots & Rainbow Evolution
Alright, this is the endgame content that keeps hardcore players grinding. Secret Brainrots (also called Rainbow Brainrots) are ultra-rare evolution variants that have an additional stat – a percentage that gives them bonus damage and health against their regular counterparts.
From my research and talking with other players, most Secrets have about a 1% chance of dropping from specific crates. Some are even rarer at 0.5%! I’ve been chasing Prestige Ballerino Lololo for weeks now with no luck, but when I do get it, that 120% stat boost over my best brainrot is gonna feel amazing.
The main ways to get Secrets:
- Opening crates (Lolo Crates, Vault Crates, event crates)
- Trading with other players
- Purchasing with Robux (not recommended for beginners)
- Random Machine and Merchants in late-game areas
Pro Tips & Strategies I Wish I Knew Earlier
After all my hours in this game, here are the biggest lessons I’ve learned:
1. Don’t Party Up (Usually)
This one surprised me. When you party with other players, your XP gets split between everyone. Unless you’re running a dungeon or fighting a boss you can’t solo, you’re better off going alone. I level up noticeably faster when I’m solo farming.
2. Use Auto Attack
There’s an Auto Attack toggle in the menu (below your Inventory button). I cannot stress enough how much better this makes the game. Instead of constantly clicking, just enable Auto Attack and your character will automatically target and attack enemies. It’s perfect for AFK farming while you’re watching videos or doing homework.
3. Complete Daily Quests
Daily quests give free potions and sometimes pets. I try to knock these out first thing when I log in because the rewards add up over time. Plus, some dailies give XP potions, which are absolutely clutch when you’re trying to level quickly.
4. Participate in Events
Brainrot Evolution regularly has special events with exclusive pets, evolutions, and rewards. I’ve gotten some of my best pets from events that are no longer available. Don’t miss out – event rewards are often better than anything you can get from normal gameplay.
5. Use Codes!
This one’s huge. The developers regularly release codes that give free XP potions, crates, and other valuable items. I’m always checking for new Brainrot Evolution codes to get free boosts. These codes can save you hours of grinding, especially XP potions that give 2x or 3x experience.
6. Farm Passive Enemies First
When you reach a new area, scope out where the passive enemies are and farm them first. They’re risk-free XP, and you can often find good farming loops where enemies respawn quickly.
7. Don’t Blow Wins on Early Eggs
Save your Wins! Those 10-Win eggs in the starting area might seem tempting, but late-game eggs cost 50k+ Wins and contain pets that are literally 10 times better. Be patient and save your currency for when it really counts.
8. Check for Damage Boosts Regularly
Scattered around each map are permanent damage boost purchases that cost Gems. I make it a habit to buy every single one I encounter because these stack permanently across all your Rebirths. Even small 10% boosts add up to massive damage increases over time.
Platform Controls & Settings
Let me quickly cover the controls since they’re slightly different depending on your platform:
PC Controls
- W, A, S, D: Movement
- Shift or Double-tap W: Sprint
- Spacebar: Jump
- E: Interact with NPCs, chests, and objects
- Left Mouse Click: Attack (or use Auto Attack)
Mobile Controls
- Virtual Joystick: Movement (left side of screen)
- Tap Screen: Attack
- Swipe: Camera control
- On-Screen Buttons: Jump, abilities, menu access
Optimizing Your Settings
I play on PC, but here are my recommended settings regardless of platform:
- Enable Auto Attack: Saves your fingers and makes grinding way more comfortable
- Adjust Graphics: If you’re experiencing lag, lower the graphics quality. Smooth gameplay is more important than pretty visuals
- Turn Down Music (optional): I personally listen to my own music or podcasts while grinding, so I keep game music low
Maps & Area Progression
The game has multiple areas that unlock as you level up. Here’s the general progression I followed:
| Map Name | Recommended Level | Key Features |
|---|---|---|
| Tung Tung Park | 1-11 | Starting area, basic enemies, first eggs |
| Larila Desert | 11-25 | First dungeon, better pets, Gorillo evolution |
| Chicleteiramania | 25-40 | Advanced eggs, new boss, relic merchants |
| Nuclearo Core | 40-60 | High-tier pets, merchant NPCs, tougher enemies |
| Glorbo Heights | 60+ | Endgame content, Random Machine, best rewards |
Each area has progressively better rewards, stronger enemies, and more expensive eggs. The beauty of the Rebirth system is that you’ll zoom through early areas on subsequent playthroughs.
Trading & Social Features
Trading isn’t something I got into until later, but it’s actually a huge part of the community. Players trade pets, relics, and even rare brainrots. If you’re missing a specific Secret brainrot or need a particular pet to complete your collection, trading can be way faster than grinding for it yourself.
The game has a trading system accessible through the menu, and prices are generally determined by rarity. Legendary pets and Secret brainrots can go for massive amounts of Wins or other high-value items.
Trading Safety Tips
- Know the Value: Don’t trade away valuable items without researching their worth in the community
- Use Middlemen: For big trades, the Discord community has trusted middlemen who can facilitate safe exchanges
- Don’t Get Scammed: Never trade for “promises” of future items – only trade for things you can see in the trade window
Common Mistakes to Avoid
Looking back, I made SO many mistakes when I started. Here’s what NOT to do:
❌ Don’t ignore Gems – Permanent damage boosts are essential
❌ Don’t party up excessively – Your XP gets split between players
❌ Don’t open every egg – Save Wins for late-game eggs
❌ Don’t delay your first Rebirth – The stat bonuses are too good to pass up
❌ Don’t skip dailies – Free rewards add up quickly
❌ Don’t fight aggro enemies exclusively – Passives are safer for grinding
❌ Don’t neglect relics – They’re just as important as pets
❌ Don’t forget to check for codes – Free potions and boosts are always worth claiming
FAQs
What happens if I lose a fight?
Nothing bad! You just respawn at the spawn point with no penalty. Your level, items, and progress are all safe. This makes experimenting with tougher enemies risk-free.
How do I get stronger faster?
Focus on three things: equipping your best pets, using Gems for permanent damage boosts, and participating in dungeons for better rewards. Also, don’t forget to use codes for free XP potions!
Should I spend Robux on the game?
Totally optional. I’ve never spent Robux and I’m doing just fine. If you want extra pet/relic slots or want to skip some grinding, Robux can help, but it’s not necessary at all.
Are there really big bosses in the game?
Absolutely! Each map has a boss that’s significantly tougher than regular enemies. Defeating bosses gives special rewards and helps you level up quicker. Plus, some event bosses drop exclusive limited-time items.
Can I play with friends?
Yes! You can form parties with friends, but remember that XP gets split between party members. It’s fun for dungeons and boss fights, but for pure grinding, solo is more efficient.
What’s the max level?
There isn’t really a “max level” in the traditional sense. You keep leveling up and evolving, then you Rebirth to get stronger permanent bonuses and do it all over again. The progression loop is designed to be infinite.
Do codes expire?
Yes! Codes in Brainrot Evolution typically expire after a few weeks or when new updates drop. That’s why I always check for new codes regularly and redeem them immediately.
Final Thoughts & Next Steps
Look, Brainrot Evolution isn’t going to win any awards for complexity or deep storytelling. But you know what? It doesn’t need to. It’s addictive, rewarding, and just plain fun. There’s something incredibly satisfying about watching your weird little character transform into progressively more powerful (and bizarre) forms.
If you’re just starting out, don’t overthink it. Jump in, start smashing things, collect some pets, and let the progression loop pull you in. Before you know it, you’ll be grinding your third Rebirth and chasing those rare Secret brainrots just like me.
The beauty of this game is that it respects your time (well, sort of – it’s still a grind game). With Auto Attack, you can make progress while semi-AFK. With the Rebirth system, you’re constantly getting stronger even when you “reset.” And with regular events and updates, there’s always something new to chase.
My biggest piece of advice? Don’t rush. Enjoy the progression, experiment with different strategies, and find what works best for your playstyle. Whether you’re a hardcore grinder or a casual player who logs in for 20 minutes a day, there’s a way to enjoy Brainrot Evolution.
Related Guides You Might Like
If you’re enjoying Brainrot Evolution, you’ll probably love these other Roblox experiences:
- Don’t Wake Brainrots – Another brainrot-themed game with stealth mechanics
- Roblox Admin Commands Guide – Master admin commands for your own games
- Roblox The Takeover Event – Complete guide to the latest Roblox event
- Type Soul Codes – Free rewards for another popular simulator
Remember to bookmark this guide and check back regularly for updates! I’ll be adding new sections as the game evolves and new content drops. If you found this helpful, share it with your Roblox crew – let’s help everyone master this wild game together.
Now get out there and start evolving! Trust me, once that progression hook sinks in, you won’t be able to stop. See you in Tung Tung Park!